Let's see my experiences in game development.
(NOTE: These articles are personal records of my experiences. These are not
articles to take directions from; instead, I have left references to those articles at the
end.)
If you are looking for a particular tag of project, then use Ctrl+F to search for your
desired keyword.
For simplicity with audio, I have setup videos and audio players to start muted.
Testing Unity's music synchronicity, while practicing Unity 2D platformer development.
I find it creative in games when a music track evolves / shifts over a game to create this effect of
nostalgia but also the pleasure of hearing a new version. I think it can work well with
setting moods for
scenes (like if the environment was like: a calm forest, an empty desert, snowy blizzard,
etc.); it also works wells
with boss fights to change the intensity.
I can switch tracks on cue using generic scipting cues, but I wanted to see how well Unity
does at playing multiple songs in a synchronized fashion so
then when I switch zones (like entering a cave), the music switches but keeps its same
sequence location (much like
a tune changing its instruments while it's playing). At the same time, I wanted to practice
2D platformer game development, to see if its tilemap editing is as easy as top-down 2D
development.
This is a demo video of me going on a platformer scene, with background music pieces (that I
made
in Maschine) switching as I switch between zones:
Lessons Learned
The music synchronizes very well. The first zone gives me this feeling of being in a barren
wasteland, while the second zone feel reminiscent of 'cave' levels (with retro techno-ey
tunes). However, some instruments are noticeably jarring as they switch,
so I should try making tracks that keep some common instruments (like bass) as they switch, so
the tunes transition better.
I should try this with boss fights, where the music changes to more intense versions of
itself.
The 2D platformer editor is pretty much the same as top-down, it's just you have the perspective
of side-scrolling; very straight forward.
Practicing Unity 2.5D game development with a 'Tanks' game template.
TAGS: software; Unity; programming; audio
Why I Did This
One of Unity’s lessons involved a 2-player tank battling game in 3D environment overtop a 2D
mechanic space (creating this 2.5D like environment). I was intrigued by that environment,
but not the 2-player mechanics of it. Instead, I wanted to practice my Unity skills by
turning the 2-player battle game into a 1-player vs computer battle game.
Here I made a short level where the player (a green tank) must traverse and destroy all
enemy tanks and buildings without getting killed. It demoes: object instantiation and
destruction, life bars, SFX and music (my own track), simple UI layout (just words on a
canvas with keyboard controls), win/lose triggers.
This is a demo video of me going through the level (I let the SFX go for a bit to demo the
tanks and explosions, but then I mute it and let my created music play):
The demo allowed me to try win/lose triggers for the scene overtop simple UIs, and allowed me to
create modified fabrications of different enemy tanks (with different behaviours).
I didn’t bother with the original demo’s 2-player system because I feel like most multiplayers
on not on same computer (and I wanted the interactivity of automatic enemies), so I would like
to later try learning demos of online multiplayer setups.
I got to be immersed into gameplay while listening to my audio track and it gave me perspective
on how well the track fits with the scene: I felt the music was mixing well with the scene, but
some parts I felt were overly distracting.
Trying 'FMOD', a recognized substitute application for Unity's audio mixer.
TAGS: FMOD audio engine; audio; Unity
Why I Did This
While exploring audio engineering services that work with Unity, I frequently noticed FMOD
being mentioned. FMOD is freemium (free but up to a certain revenue level, like Unity)
gaming sound engine/API that can easily hook into Unity. It was used by some notably famous
games, some like: BioShock, Dark Souls, Minecraft.
I wanted to see what it has to offer that may compare to the standard Unity audio
tools.
Here I demonstrated a notable feature of Fmod: the visual parametrization of a SFX group
which allows me to combine, speed up, and trigger
different motor sounds to create a variable go-kart engine noises based on variable input
velocity.
Karting microgame with original kart SFX
FMOD's visual parametrization of sounds (lawnmower), against kart RPM/gas/velocity
level, to be used as replacement kart SFX
Karting microgame with FMOD's kart SFX
Lessons Learned
The FMOD SFX replacement sounds marginally better, but probably no difference to most listeners.
FMOD has a learning curve and I'm assuming the basic Unity
audio tools
(especially with the newer editor versions) seem to do most of what FMOD can do (I
think). However, I
haven’t explored the entirety of FMOD; so there might be crucial/quality features that
FMOD has,
that Unity doesn’t. While the visual parametrization (that FMOD was demoed with)
seems useful,
it can be substituted with in-depth audio scripting (i.e. precise code that mimics
parametrization).
References
FMOD for Unity: https://www.fmod.com/unity
FMOD tutorials: https://www.fmod.com/learn#tutorials
Trying 'Fadr' service to split music files into stems and MIDI files.
TAGS: Fadr; audio; Maschine
Why I Did This
Stem files are a group of music tracks that were split from an original track into their
separate fields (of instrumentals and vocals). Previous delves into MIDI files have shown me
how to manipulate a tune’s sequence to remix it with different instruments or modified
sequences. Stems can manipulate tracks by dividing them into respective zones allowing me to
remix parts of the track, while leaving the rest intact or moving those parts to different
tracks altogether.
The Fadr website allows me to freely (at a basic level) create stems and MIDIs from upload
tracks. My Maschine software can easily import stems (in the form of WAV files), along with
MIDIs, to experiment with different combinations of instruments to remix tracks.
Unity includes an upbeat track for the ‘Karting’ microgame that I decide to remix using its
stems and MIDIs. (note: these tunes are NOT for commercial use, they are just educational
demos).
Original tune is the first half of this track, while the remix is the last half; here I
replaced the piano tunes with rock and bass guitar tunes, while keeping the drums same
throughout:
Lessons Learned
As demoed, stems (along with MIDIs) can further extend the remixing abilities of a song.
Furthermore, if I no longer have the original Maschine editor files for a track (which
distinctively list all instruments and sequences separately), I can use this service to easily
cut
old copies of my WAV or MP3 songs. The Fadr service is free for basic level stem cutting, and
requires a subscription to get enhanced cutting (a further precise stem making operation), so it
would be nice to find a free alternative service that does that too.
References
Fadr service (for extracting stems and MIDIs): https://fadr.com/stems
What is a track stem: https://en.wikipedia.org/wiki/Stem_(audio)
What is a MIDI file: https://en.wikipedia.org/wiki/MIDI
Maschine DAW software:
https://www.native-instruments.com/en/products/maschine/production-systems/maschine/
Experimenting with MIDI file generations to remix songs.
TAGS: software; audio; Maschine
Why I Did This
Musical Instrument Digital Interface (MIDI) files are the data forms of music composition
sequences, so they can be very useful for modifying in order to create remixes of
scores.
My Maschine software can easily import MIDIs to autofill the editor with sequences, and I
can then experiment with different instruments to play them or modify the sequences to
change the tune.
Given that I am a fan of the Zelda game series, I used MIDI files from “A Link to the Past”
(awesome classic game), to modify the instruments and notes to remix those tunes. (note:
these tunes are NOT for commercial use, they are just educational demos).
Original ‘exploring’ tune:
Remixed ‘exploring’ tune (makes it sound like spooky music):
Original ‘boss fight’ tune:
Remixed ‘boss fight’ tune (makes it sound like cyberpunk-like music):
Lessons Learned
As demoed, MIDI files can be extremely useful for remixing tunes; I would find this extremely
useful if making a series of games (or even just levels) that have a thematic tune that slowly
evolves; like this Link To the Past ‘exploring’ tune was actually remixed from the original NES
Zelda game.
Aside from nostalgia, these tracks can be inspirational when they are assigned different
instruments with different effects; I wasn’t expecting to be feeling a spooky environment when
playing the ‘exploring’ MIDI on different instruments.
References
'Zelda: A Link to the Past' play demo (and tunes):
https://youtu.be/Z6hjG6MCcZ8?si=DvHk5l2lhrdPIlle&t=2078
What is a MIDI file: https://en.wikipedia.org/wiki/MIDI
Maschine DAW software:
https://www.native-instruments.com/en/products/maschine/production-systems/maschine/
I saw this program advertised on EA’s website, so I wanted to explore what developers do
there. It was free, self paced, and could have increased my skill profile, so it seemed
worthwhile to explore.
In the program I was tasked to:
- Create a new feature for the ‘Sims 4’ game and present it in the form of a written
proposal. (I went with an Aeroponics tower item for the Sims garden area).
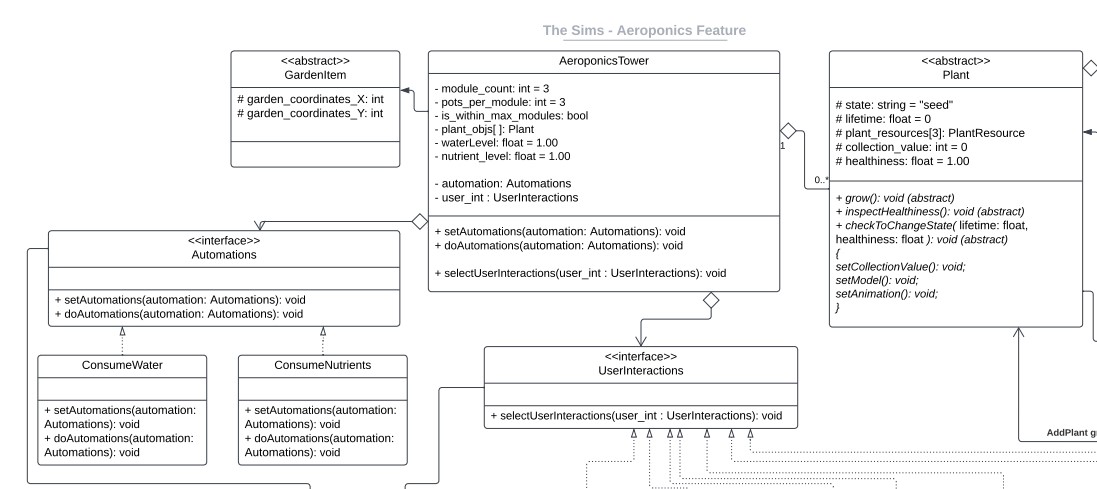
- Develop a UML class diagram of the object-oriented layout of the previously mentioned
features.
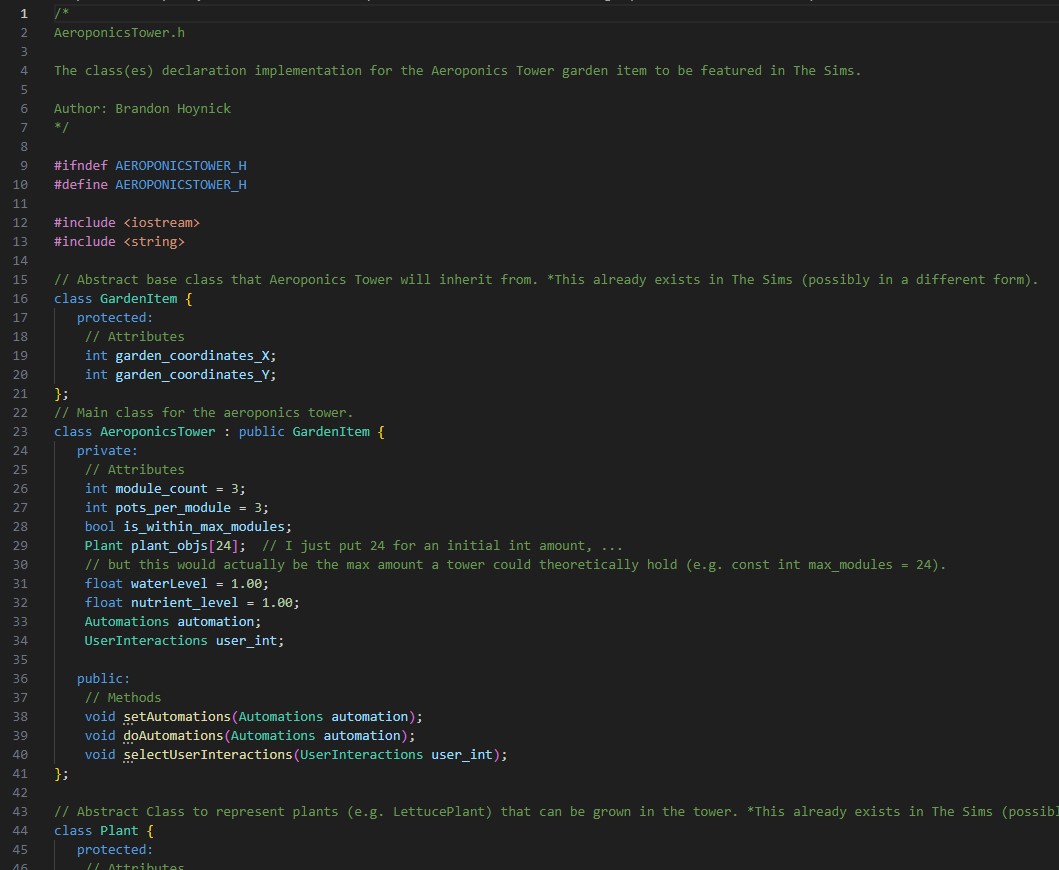
- Code a C++ header file (function declaration file) of the previously mentioned
features.
- Fix code bugs by analyzing an assignment C++ file and changing it. (It was mostly around
changing variable and method data types to ones that were more flexible and future proof).
Completion certificate:
Snippet of part of my UML diagram:
Snippet of part of my C++ header file:
Lessons Learned
I already knew about these given tasks from my university Computer Engineering schooling, but it
was still useful to get insight into how EA does things (though I think these 4 tasks are a
‘drop in a bucket’ of what an EA software engineer does; I would have like this experience to
have had more tasks); I rarely used C++, so it was nice to get more experience with that.
References
EA Software Engineering experience, on Forage:
https://www.theforage.com/simulations/electronic-arts/software-engineering-awbf
The Sim 4 game:
https://www.ea.com/games/the-sims/the-sims-4
Using audio scripting to parameterize sound effects.
TAGS: Unity; programming; audio
Why I Did This
Playing/triggering sound effects and music in a static setting is usually good enough for
simple game scenes, but there are times where customization of audio improves the quality of
a scene.
I went through a Unity demo where I was able to combine multiple sound effects with a code
script that parameterizes a projectile’s force intensity to output different sound effects
of different intensities.
Here we have a small demo of a projectile launcher firing
against a
stack of cubes; higher force collisions produce strong crashing noises, while weaker ones
produce weak crumbling noises; it creates an overall effect of a building toppling with loud
noises that trails/ends to weaker noises:
Lessons Learned
As said before, this can be unnecessary for simple games, but it also shows just how a little
scripting effort can make higher quality scenes. I imagine putting these algorithmic
techniques on enemies so that when I hit them with different force intensities, they can react
with different moan/hurt intensities (all without individually assigning various noises to individual
enemies).
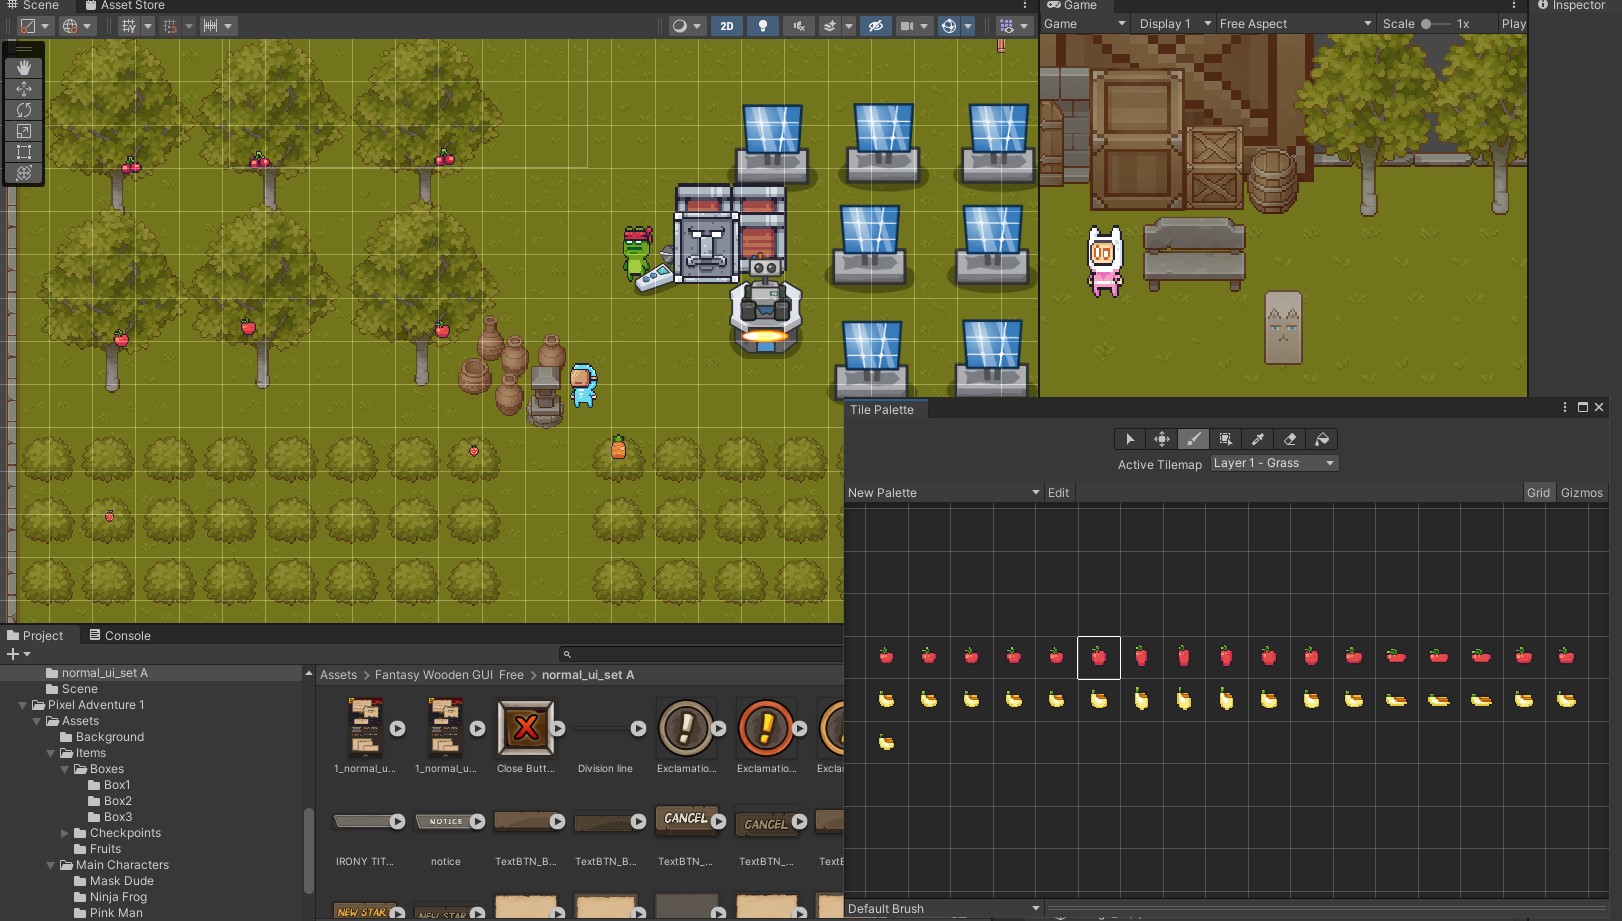
Unity has dedicated tools for 2D development; these include tilemap and spritemap tools that
make it easy to paint a scene with a 2D environment.
I practiced with these tools to create a top-down 2D environment as a starter simulation for
my UAlberta student club Renewable Energy Design (RED) (I’m not making anything for that
club, I’m just using it as a simulation inspiration for 2D top-down development).
Lessons Learned
I’m still learning, but so far the 2D tile-mapping feature is very easy. I wonder if I can
apply previous lessons about procedural content generation (from my previously taken
CMPUT256 course and other internet resources) to create scripts that will generate new
levels automatically.
References
Unity's tile-mapping tutorial: https://learn.unity.com/tutorial/introduction-to-tilemaps#
Restful Coder's 2D tile-mapping tutorial:
https://www.youtube.com/watch?v=PAA_lCutsfE&ab_channel=RestfulCoder
RED student club: https://alberta.campuslabs.ca/engage/organization/red
CMPUT256 Game AI UofA course: https://apps.ualberta.ca/catalogue/course/cmput/256
Reflecting on Unity's Foundations of Audio to practice spatial audio tools
TAGS: software; Unity; programming; audio
Why I Did This
Unity has many tutorials around audio tools but they are in most case just audio file
assignment.
Some of the more dynamic tools Unity has are the 3D audio tools which allow for:
-Listeners and emitters (player and sound sources).
-Spatial distance audio intensity (the further away a sound is, the quieter it is).
-Doppler effect (as a sound move towards you it is higher pitched, and vice versa).
-Reverb zones (audio sources gain effects when they are in marked zones).
I demoed these effects on a Monster growling scene asset (which shows the SFX tools) and
Viking village scene asset where the player ‘listener’ (a rock)
was moving near fire sources embedded with spatial flames sounds and siren doppler sounds,
and a building producing 'hall' audio effects (reverb zones).
Spatial intensity audio (right torch, with flame sounds) and doppler effect (left torch,
with beeping sounds) in Viking village:
Reverb zones (echo-ey cabin zone, with footsteps) in Viking village:
Lessons Learned
It was good to get more in depth knowledge of Unity’s audio tools, especially around dynamic
audio effects. So far the tools/controls seem straight forward. I would like to explore more
with audio tools that can mingle with game mechanics (like using an in game instrument, like
flute or
ocarina, and tune sequence, to trigger doors/chests).
References
Unity's 3D Audio tutorial:
https://learn.unity.com/tutorial/3d-audio-in-unity?uv=2019.4&projectId=5f4e4ee3edbc2a001f1211df#
Uity's reverb zones tutorial:
https://learn.unity.com/tutorial/audio-reverb-zones?uv=2019.4&projectId=5f4e4ee3edbc2a001f1211df#
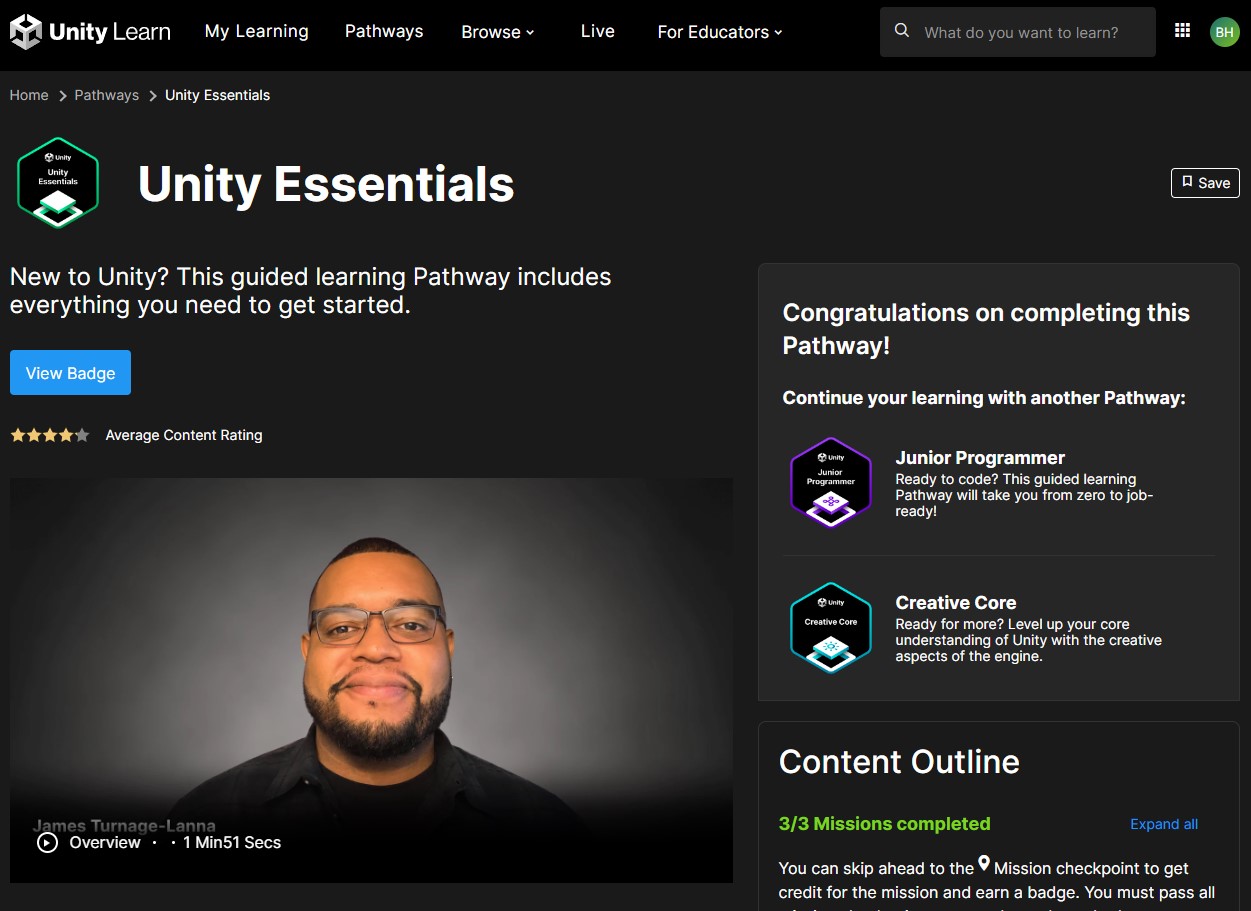
Unity contains an online learning center, for learning the engine, called Unity Learn. The
first of the major pathways is ‘Essentials’ where student learn the basics of the engine
(like: installing it and the Hub, interacting with microgame ‘starter’ templates, explore
other learning resources, and how to find game assets).
I already had generic experience with the Unity editor so most of the learning in this
pathway was redundant knowledge, but there were some points that I did not know so it was
worthwhile to go through.
Essentials completion page:
Lessons Learned
A lot of the content was redundant as I already knew the basics of the Unity editor, but they
did provide links of useful free assets and learning resources which is always appreciated.
My Experience With Using Unity To Develop Scenes In UAlberta's AR App
TAGS: software; Unity; University of Alberta; Augmented Reality; smartphone; programming
Why I Did This
I had the opportunity to work with some fine people on the University of Alberta's
Augmented Reality app called “UAlberta AR”. The app showcases many engineering course
concepts that students and teachers can use as an aid in visualizing/ experiencing said
concepts. It was a great experience to develop my Unity skills but also develop team
collaborations skills especially with DevOp style git version control (we had our project on
a git repo and used Unity's Continuous Integration checker to check our updates everything
we made a revision to
the app). We also followed a sprint team review style when setting project goals.
UAlberta AR: an app for showcasing engineering course concepts.
I made quite a few scenes, but I uploaded to YouTube a showcase video of three scenes I
particularly liked: https://youtu.be/-mmq2LekMbI
The video description details more about the project and scenes.
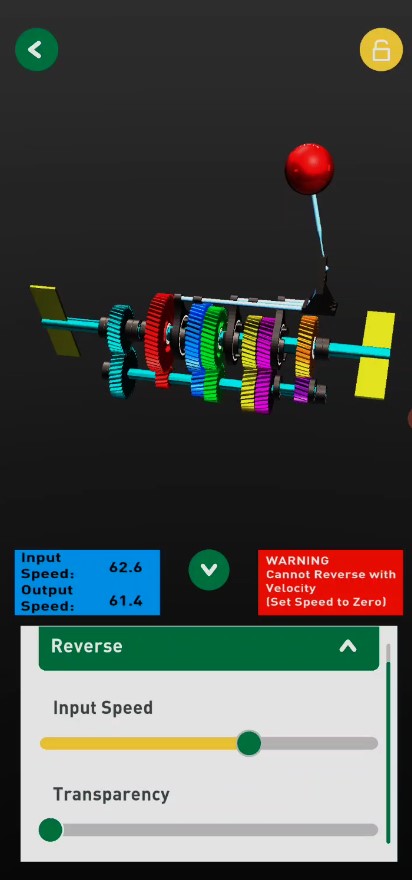
One of the scenes: seeing the internal workings of a 5-speed transmission.
Lessons Learned and Future Changes
It was a great experience! I got to develop my
Unity skills and collaborate with other teammates on their Unity skills. I learned more about
the sprint work style. I got to see how Unity does continuous integration. I learned more
engineering concepts while I developed the simulations for them.
References
Unity game engine: https://unity.com/
UAlberta AR app: https://play.google.com/store/apps/details?id=ca.ualberta.ar&hl=en_CA&gl=US
YouTube video: https://youtu.be/-mmq2LekMbI
My First Unity Experience While Doing A Pedagogical Research Study
After my first year of engineering, I was asked by my MacEwan University teacher, Dr. Davis,
if I wanted to participate in an Undergraduate Student Research Initiative (USRI) study. The
study was centered around researching if augmented reality tools could aid in a student's
learning.
I wanted to participate mostly because it was an opportunity to learn the Unity game engine
(which I have never used before, but heard it was great for developing games and
simulations). In this study I researched what other articles focused on AR for pedagogical
use and if I could develop scenes in Unity (and Fusion 360 for drawing) that reflected
engineering course concepts that could be better explained with AR model scenes.
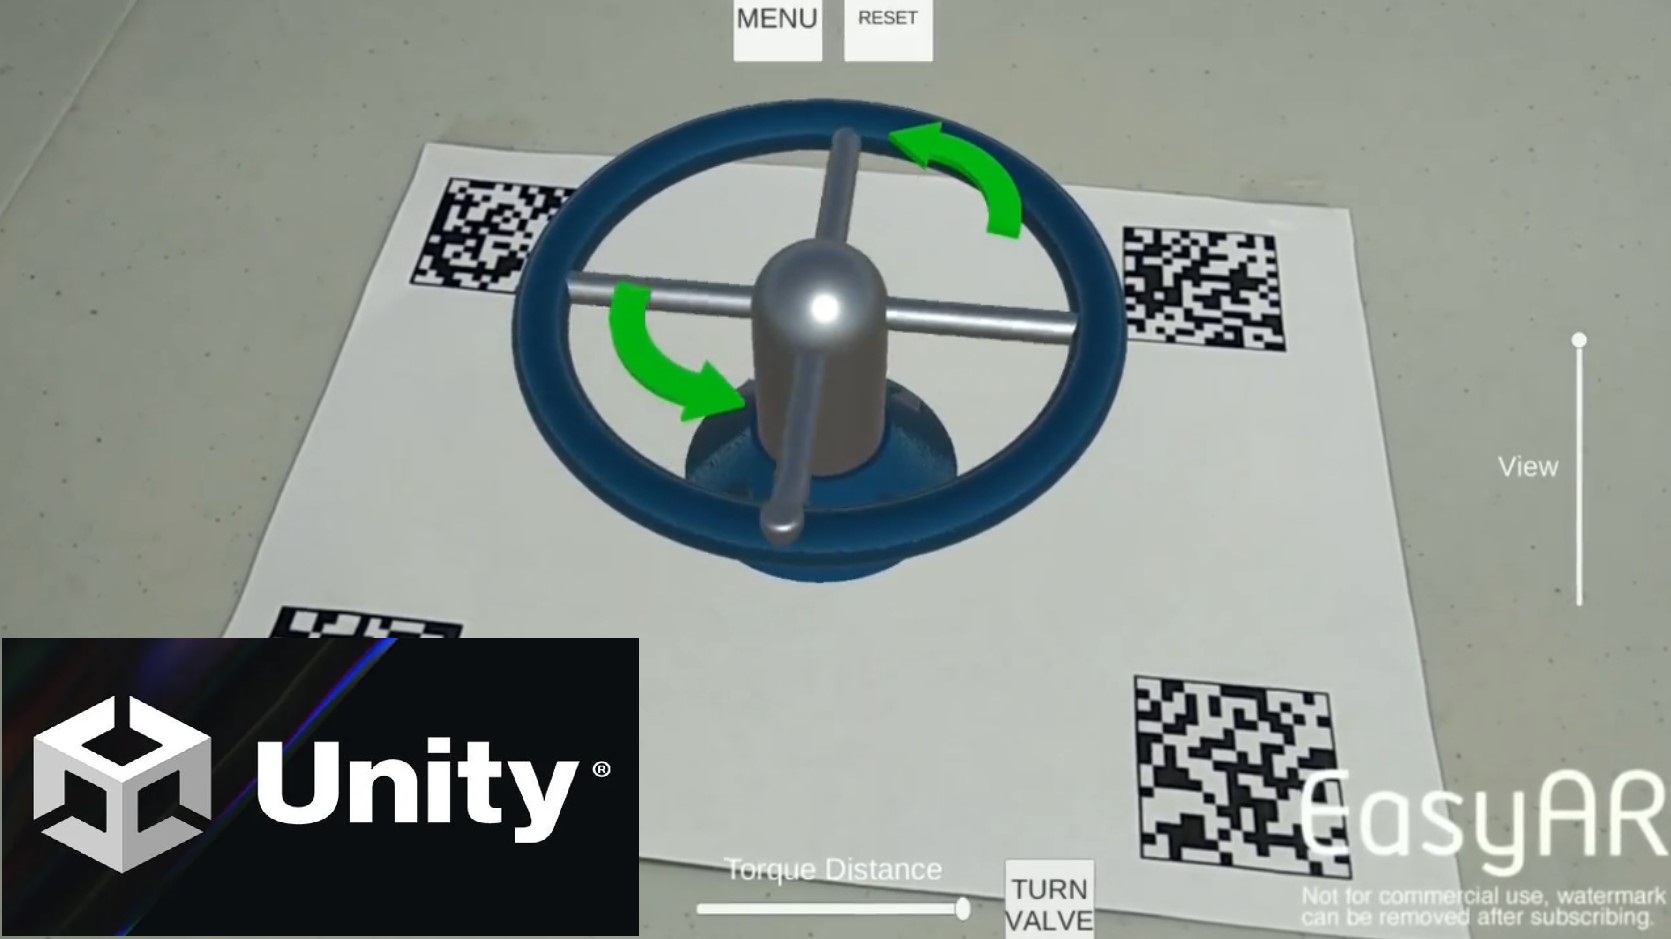
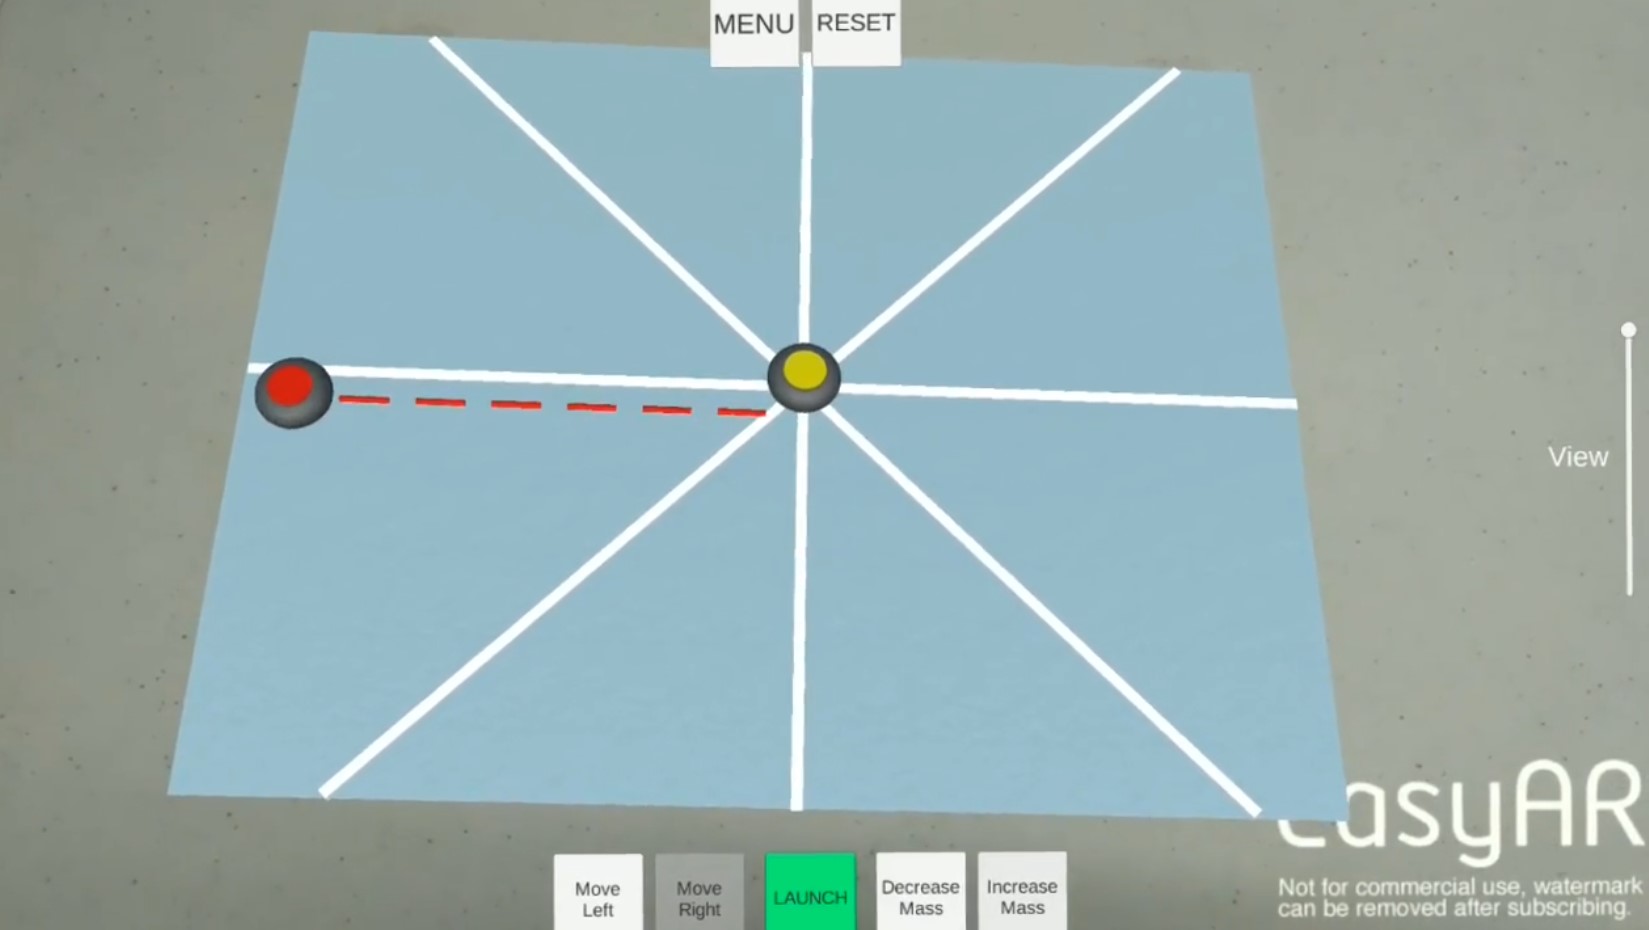
My first project experience using Unity; Studying the pedagogical uses of AR when
learning engineering course concepts.
I made a summary video on YouTube that showcases what Unity scene's I was developing and
what engineering course branches (Mechanics, Computer) they were fixed on. The video
description also has details for the project and each scene. In Unity, I used an AR library
called EasyAR because my phone didn't have the depth-AR capabilities that other AR libraries
needed.
YouTube link (apologies for the shakiness; I was holding the camera by hand trying to
record, and keep the background aligned, and activate buttons/bars): https://www.youtube.com/watch?v=5aArtjM2tWk
Another version (I tried to stabilize the shakiness of the first video, but it made other
items shaky): https://youtu.be/g37nufiZfr4
One of the scenes: visualizing momentum factors, with curling rocks.
Lessons Learned
Unity is a pretty cool simulation tool. This was my first experience with the basics of
Unity (layout, folder placement, tool locations) and its pretty nice to use. This was also my
first real coding experience, and I did not find that too overwhelming; I coded scripts in C#
(all animations, except the Valve one, were created through coding writing, like rotations, UI
buttons, colour manipulations). I gained an understanding of an immediate use of AR in 3D modeling. So far, a prime use
of AR is
to take computer model prototypes and visualize their placement in the real world without
physically creating an expensive time consuming model with immediate changes/regrets to that
model; e.g. placing a AR-model of a complex engine in a real-world empty corner, and immediately
realizing that currently installed fuel supply lines, from the real-world, would approach the
AR-engine's fuel injection points at an impractical location/angle, quickly making me realize
that "I should have modeled the engine's fuel lines on the other side", but I didn't build the
engine yet, so I could easily change the 3D model without causing money-losing regrets.